Step by Step Guide: How to Create and Assign Schedules in Blueforce
Use the Blueforce scheduling module to assign employees to work, indicating when an employee should work and where.
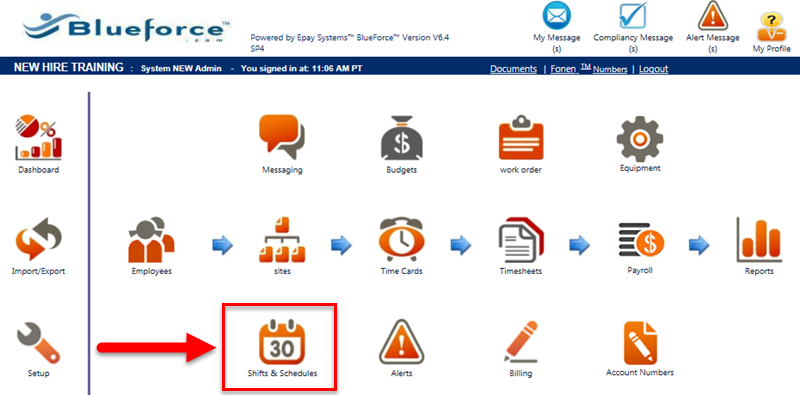
- Select Shifts & Schedules from the Blueforce dashboard.
- Select All Site(s) to apply shifts to all sites and employees.
- Return to the Shifts and Schedules module from the main page.
- Select Site and Date Range and select Search.
- Select Add New Schedule.
- Select the Site the schedule applies to.
- Assign a Schedule Name. This is the designator for the schedule. Name it something that will help you to assign it to the correct employees.
- Enter the Effective Period “from” and “to” dates. If you wish to create a template so you can copy this schedule to others, select the Mark As Template check box.
- Select the shift to apply the schedule.
(Note: If you didn’t already create a Shift in Blueforce, you may add one now. For more information on Shift Management in Blueforce, visit Knowledge.) - Select the Shift closest to the schedule you’re creating. Select the Task Type and Task to which it will apply. (You may also leave these at ALL.) Select Search.
- Select from the following options (whichever applies):
- Select Fetch plans from to copy another schedule from the selected location. Select the check box With resources to include all employees currently on the other schedule. Select Copy.
- Select Add New to create a new schedule using the shift times already selected.
- Select Add Shift if the shift needed isn’t already listed in the Search Criteria. A pop-up box will display allowing you to add a shift on the fly.
- Set the number of employees required per day on the Shift selected. Select Save when complete.
- Use the drop down list per day to select from the list of available employees who meet the selections made for Shift, Task Type and Task. Do this for all available slots. Select Add New to add another line of employees to a schedule. Select Save Changes to save or Discard Changes to undo your edits. Select Close to move to the other tabs.
- Choose the Employee Schedules tab to view schedules by Employee, Job, Account Number or Shift.
- Select Excel or PDF to export.
- Scroll through the schedule or change the drop downs to view another group.
- Choose the Availability Calendar tab to see employee availability by date and name for the selections made at the top of the page.
Contact EPAY's technical support team for help or more information on creating and assigning schedules in Blueforce. Call: 877.800.3729 - Option 2. Email: support@epaysystems.com.


